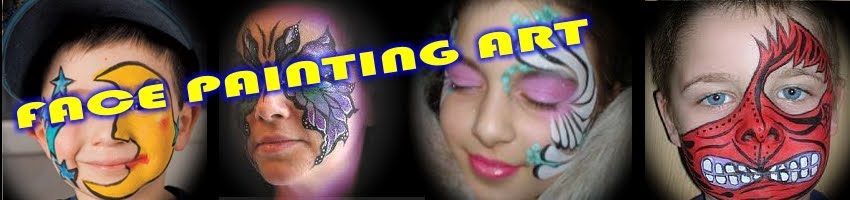
You can find your free face painting idea on the Internet. Start by keying in "face painting ideas" or "face painting designs" into the search engine and familiarize yourself with common themes if you are a beginner. You can also search specifically for images so that you can quickly scan over some visuals to save into your computer.
After researching on face painting designs, start searching for "face painting materials" or "face painting supplies." The purpose here is to find other possible materials you can use to enhance your face painting idea. For example, you may find that glitter or body jewelry can actually be used to make your idea even more creative.
Furthermore, you can find a free face painting idea in your local art and crafts store as well as in the library. Scan through some body art, face painting and coloring books. Going through stencil cutouts is also a good idea if you'd like to know basic and popular shapes to use on the face. Sometimes all you need is an outline and then you can decide on a color combination. One of the major points of face painting is that you can be as creative as you want with color, just as long as you incorporate the right techniques to prevent smudging. If you'd like to familiarize yourself with color combinations, look for color tables or wheels in the art and crafts store.
Tuesday, January 6, 2009
Looking for a Free Face Painting Idea
Sunday, January 4, 2009
Many Faces Of Face Painting
A face can be transformed in its entirety, into an animal, character or monster. Face painters often use stencils, which are painted and then stamped onto the face, and can be popular, too. Whatever designs the children, or even adult asks the face painter for, there are a hundred ways to go about getting a great design.
Stencils and stamps are probably the easiest way for beginners to successfully do face painting. The stencils themselves can be cleaned with alcohol or wet wipes between paintings for sanitary reasons. A brush is then used to apply a new color or set of colors for the next child. Different colors can be used for separate parts of the stamp. For example, a butterfly can be outlined in blue and filled in with yellow. The stamp is then pressed against the person's cheek. This is a good way to get the lines just right each time.
Many people who do face painting will do everything with a paint brush. Whiskers, dog eyes, hearts, rainbows and Spider Man are all popular. For the 4th of July, a face could be painted completely with red, white and blue stars. For Easter, decorative eggs, bunny rabbits, flowers and baskets can all easily be painted onto the face. Try hearts for Valentine's Day, or a candy cane face with alternating red and white stripes for a wild, Christmas gathering. People will surprise face painters with creative requests, however. Be prepared to paint just about any character, emblem or color imaginable.
Halloween certainly boasts the biggest number of face painted ghouls, vampires, monsters and more. For the Hulk, one can simply paint their faces green. You can also use a simple Halloween theme, as well. Try bats, a spider web face, or an eerie yellowish tint for a witch's face. Zombies and ghouls can cast sunken features under their eyes and paint blood around their mouths. Of course, the characters don't have to be scary. It's not hard to paint a clown face, with a little patience for painting a giant mouth, or using a solid color to enhance a costume, such as a giant raisin, bear or anything else one can build or find a costume for. Many Halloween costumes will provide directions for adding face painting.
There are also plenty of kits in stores or on the web, which are geared for specific characters, or that come with all the colors for one's own creativity to come out. In general, these paints are a little thicker and harder to remove than the typical face paint used for your everyday festival or event.
Tuesday, November 18, 2008
Christmas Face Painting Games

Sunday, November 16, 2008
Face Painting Ideas For All Ages
Certain themes seem to be favored by girls while others by boys. For example, girls often enjoy having their faces painted along the following lines: butterflies, cats, cuddle animals, puppies, fairies, princesses, bunny rabbits and other small furry creatures, ladybugs, flowers, elves, rainbows and mermaids.
Boys often enjoy being painted as superheroes (like Spiderman or Batman), pirates, more ferocious animals like tigers or lions, bats and other 'spooky' creatures, clowns, aliens, robots, rock stars and adventure characters. Both girls and boys share many of the same face painting ideas when it comes to Halloween: ghosts, witches, warlocks, devils, skulls, spider webs, bats, black cats, monsters, aliens, clowns and magical beings of all sorts.
Face painting ideas for adults run the gamut from the comical to the merely whimsical, from the horrifying to the sedate, and from the prosaic to the sublime. It is not uncommon for adults to toss their inhibitions aside and cover themselves with 40 pounds of insulating foam and paint, pieces of furniture or gallons of dyed sugary syrup designed to mimic blood and gore.
The Comprehensive Guide to Face Painting is your source of ideas on how to paint faces the way professionals do. It's easy, fun and exciting to get professional results with our downloadable ebook. Complete with step-by-step instructions for 50 popular designs and over 600 detailed photographs, the Guide will show you how to do everything in clear, easy to follow directions for faces that will delight your children and amaze your friends.
Whatever your gender or age, your imagination and natural likes and dislikes will determine what you will end up looking like when you have your face painted. Before you go too crazy letting your imagination run riot, please keep in mind the following safety precautions about face painting:
• Do not use toxic paints or ones that induce allergic reactions
• Do not use paints that are flammable or otherwise dangerous
• Make sure that all applications of paint, makeup, gels, pastes and other substances are easy to remove without damaging your skin
• Plan your designs carefully to maximize enjoyment and minimize possible problems
• Do not use inappropriate tools when applying paints
•Keep paints and other substances well away from eyeballs, inner ears, the insides of the nostrils or mouth
That's it! Keep it simple, sane and creative. Have fun and enjoy your new face!
Tuesday, November 4, 2008
Make up a Christmas Cookie Tray

Step1 You should preferrably have several kinds of cookies to put on your tray, maybe 4 - 7 types.
Step2 Pull your hair back. Wash your hands or wear gloves. Get out your tray. Lay it in front of you.
Step3 If your cookies are different sizes, start with the largest size cookies. Put one row of cookies all the way around the edge of the tray. Lay them so they rest a little bit on top of each other. You want one cookie to have one edge under the previous cookie and one edge on top of the next cookie.
Step4 Start with the next size or type of cookie. Lay these inside the first row of cookies. Again nest them so they are under the edge of the previous cookie and over the edge of the next cookie.
Step5 Lay out all the cookies on the tray until you are pleased with how they look. You can stack extra cookies and make a second layer if you like.
Step6 Wrap with plastic wrap carefully. If your tray is too large, you may need to put two pieces of plastic wrap side by side, and then wrap your tray. Put a bow on top.